One of the best things included in the vCenter Server Appliance is the automatic update feature in the Appliance Manager. This handy feature makes updates to a VCSA simple and quick. Unfortunately, using vCenter HA, included in the VCSA 6.5, breaks this patching for most users. Why? The simple answer is that the secondary and witness appliances exist on a non-routable IP range for customer who have chosen
Patching a vCenter Server Appliance (VCSA) in a vCenter HA configuration is a little different than patching, but its still easy.
Get the Patch Needed
- Login to My VMware
- Go to View & Download Products
- Select Download Patches on the right sidebar
- Select VC and 6.5 under the menus and then click Search
- Locate the update in the list and select Download.
Update the VCSA’s
Maintenance Mode
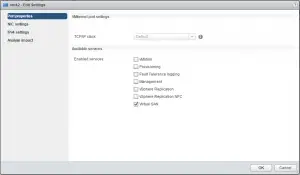
With a VCSA in HA configuration, you need to put the HA cluster into maintenance mode. Before you can do this, the HA cluster must be healthy. To check for this, navigate to the vCenter root on the left tree of vCenter Web Client, then click on Configure and then select vCenter HA. Under the vCenter HA is enabled label, look for a green indicator. If it is green, you’ll see the “All vCenter HA nodes are accessible and replication is enabled. Automatic failover protection is enabled.” message and you’re good to go.
Click Edit and select Maintenance Mode and click OK. This puts the cluster into maintenance mode so it will not automatically failover.
Upload the Patch to Datastore
The easiest way to access the patch ISO for me was to upload it directly to a datastore. To do this, browse to a datastore accessible to all of the nodes running the VCSAs. Go to Files on the datastore and then upload to the datastore. You will use this later in the process.
You could also use the ISO as a client device or from the Content Library. I think the Content Library is overkill for an ISO that will be used once and then discarded, but it is an option, too.
Patch the Nodes
The rough plan for updating is to :
- Take a snapshot of all three vCenter VMs
- Patch the Witness node
- Patch the Secondary node
- Failover the cluster to Secondary
- Patch Primary node
- Failover back to the Primary node
On each node, you will do the following steps:
- Attach the Patch ISO as a Datastore ISO on the VM
- Open console and press ALT+F1 to go to the login page
- Login to the VCSA as root ** DO NOT go into the BASH shell
- Execute <code>software-packages install –iso –acceptEulas</code>
- The patches will all be loaded and you will be prompted to reboot
- Execute <code>shutdown reboot -r “ESXi 6.5 Patching”</code>
- Repeat for next node
Simple, easy & quick.


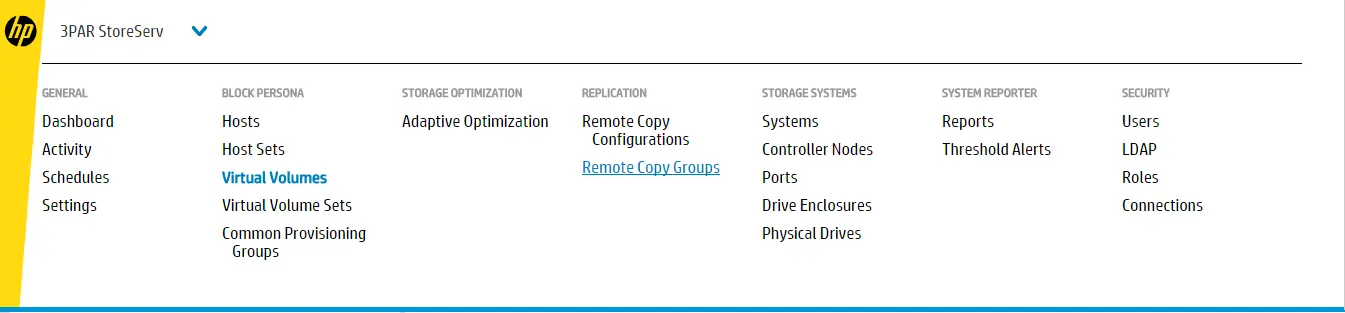
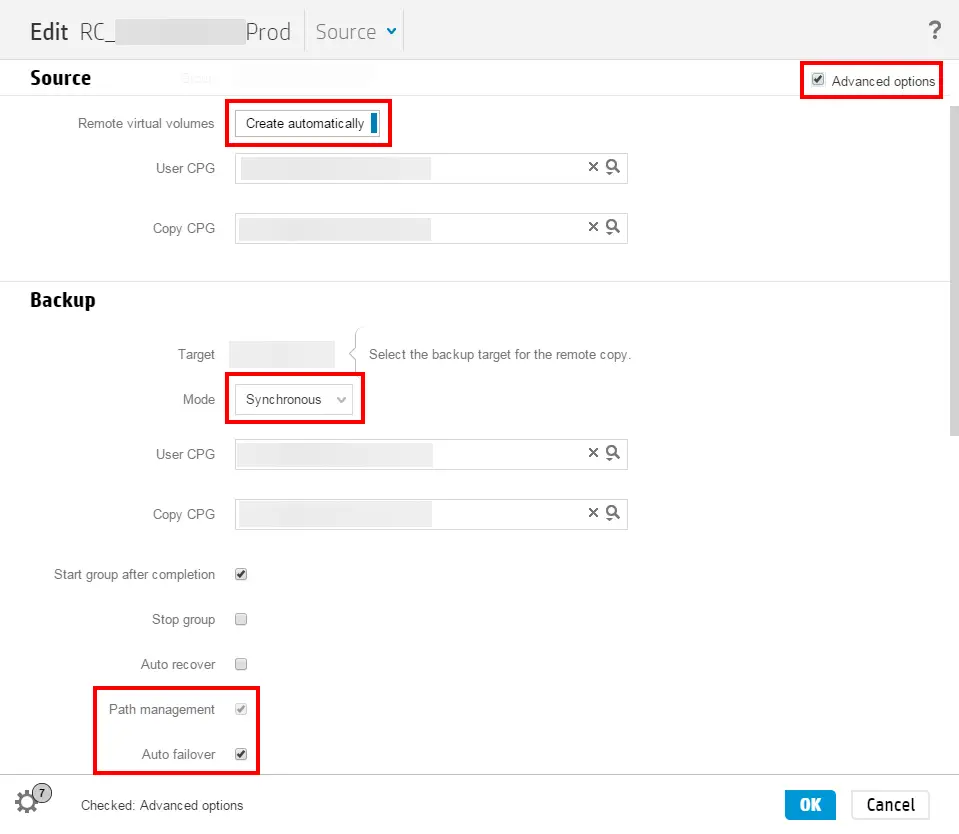
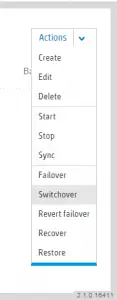 With the 2.1 release of the HP 3PAR StoreServ Management Console, HP has enabled the creation and control of Peer Persistence configurations within the management tool. Peer Persistence is the HP branding for transparent LUN failover between storage arrays with no downtime – a concept VMware administrators will recognize is Metro Storage Clustering in the VMware vernacular. HP 3PAR Peer Persistence relies on operating systems which can use the ALUA command set of of the SCSI bus to recognize open and closed paths to a single volume. The source array provides open paths while the replication target shows its paths in standby. At a high level, when a switchover command is issued, the path states change from active to standby and vice-versus. ALUA allows the OS to recognize and redirect IO. Add a quorum witness server to the switchover magic and you have a