Altaro is introducing a new version of their backup software that now adds support for VMware. The previous version was called Altaro Hyper-V Backup. The name change reflects support for backing up VMs regardless of Hyper-V or VMware. I had the opportunity to Beta test the new version and I wanted to share with you the results of my testing.
First things first, what do I install the Altaro software on? It has to be installed on one of the following operating systems:
• Windows 2008 R2
• Windows Server 2012
• Windows Server 2012 R2
• Windows 7 (64-Bit)
• Windows 8 (64-Bit)
• Windows 10 (64-Bit)
In my lab environment I had access to a Windows 2008 R2 system so that is what I installed it to.
Here are the versions of VMware that are supported in this new version:
Versions of VMware supported:
• VMware vSphere 5.0, 5.1, 5.5 and 6.0
• VMware vCenter 5.0, 5.1, 5.5 and 6.0
• VMware ESXi 5.0, 5.1, 5.5 and 6.0
In our lab we are running 6.0. All the prerequisites have been met. The installation of the Altaro software is very simple. Accept license agreement, tell it what path you want to install it and click Install. Like I said, simple!
After the software is installed, fire it up. You will be presented with the screen below:
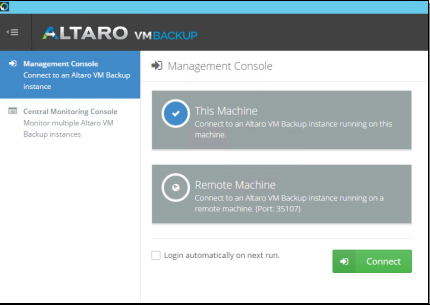
Since this is the Altaro instance that I want, I will choose this machine and click Connect. This will send you to the dashboard. Now you need to add your VMware hosts. To do this, click on Setup > Hosts and click the Add Host button to get the wizard below.
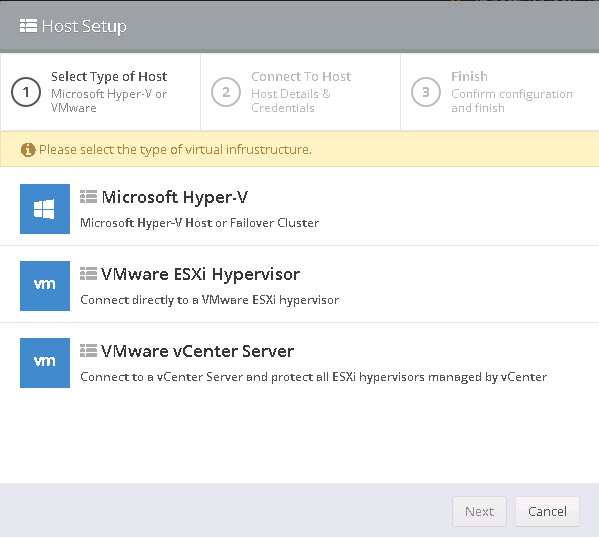
I have a vCenter server in my lab so I am going to click on that option.
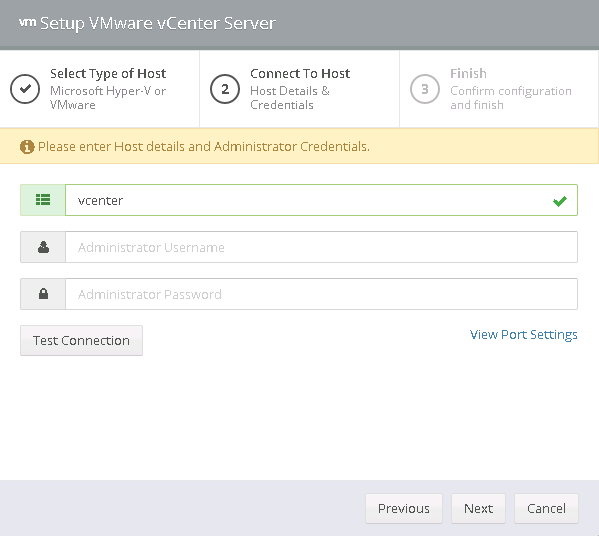
Enter your vCenter server name and admin username and password. Click Test Connection to make sure your credentials are working properly and then click Next. You will be presented with the hosts that the vCenter instance knows about.
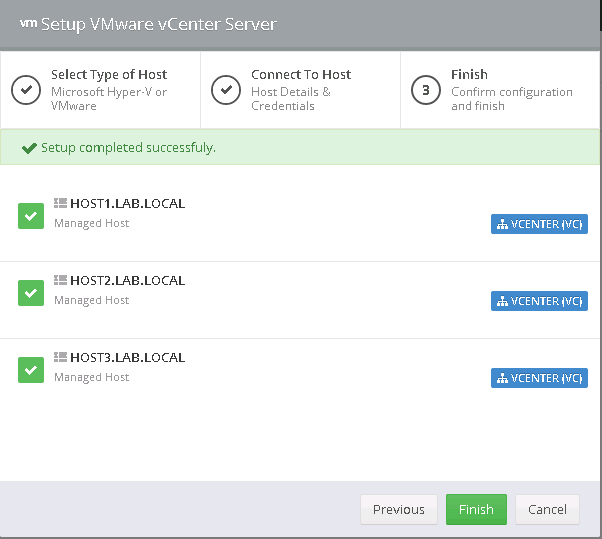
Click Finish and the hosts will be added.
Next we need to setup our backup location. This can be a local drive on the Altaro server or a network path. For my lab test I am using a local drive on the Altaro server. To add the backup location, go to Setup > Backup Locations and click the Add Backup Location button.
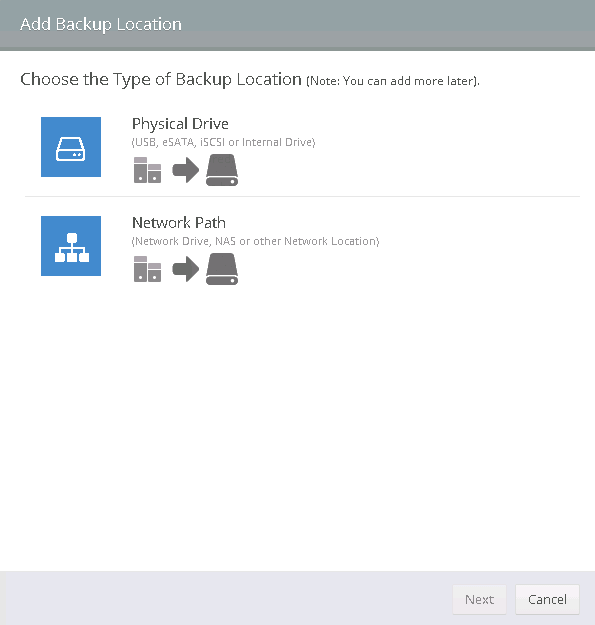
I am going to click Physical Drive and click next and choose my D drive. I can specify a folder if I want the backups to always go into a certain folder. Once I have decided I just click finish and the backup location is set.
Now let’s setup a VM for this backup location. While I am on the Backup location screen there is an inventory view of all the VMs known to Altaro as shown below.
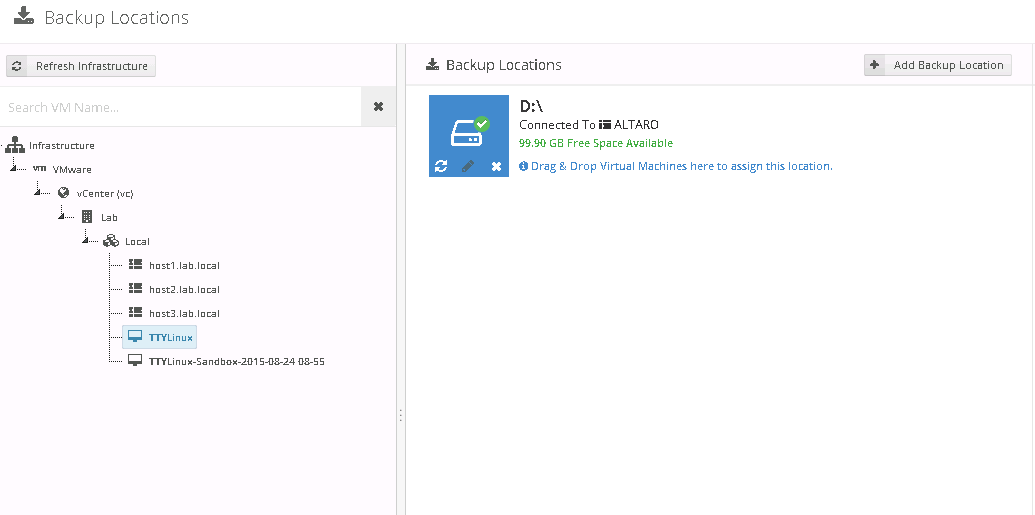
To assign VMs to my D drive backup location, I just select the VMs on the left and drag them over to the D drive. I am going to set TTYLinux to this location.

As you can see in the shot above TTYLinux will now use D as its backup location. Click SAVE CHANGES at bottom right to save these changes. If you forget to do this, the software will remind you.
Now let’s setup a backup schedule. To do this go to Setup > Schedules.
There are 2 default backup schedules already set: M-F at 10 PM and Sa-Su and 10 PM. I am going to use the Sa-Su 8 PM backup schedule. To do it, you just drag and drop the VMs to assign to that schedule. Click SAVE CHANGES to save it.
That is the basics of setting up Altaro for backing up VMware VMs. I will now cover a few other options of interest, the first one being Backup Retention.
To view the default options for backup retention, go to Setup > Retention Policy.
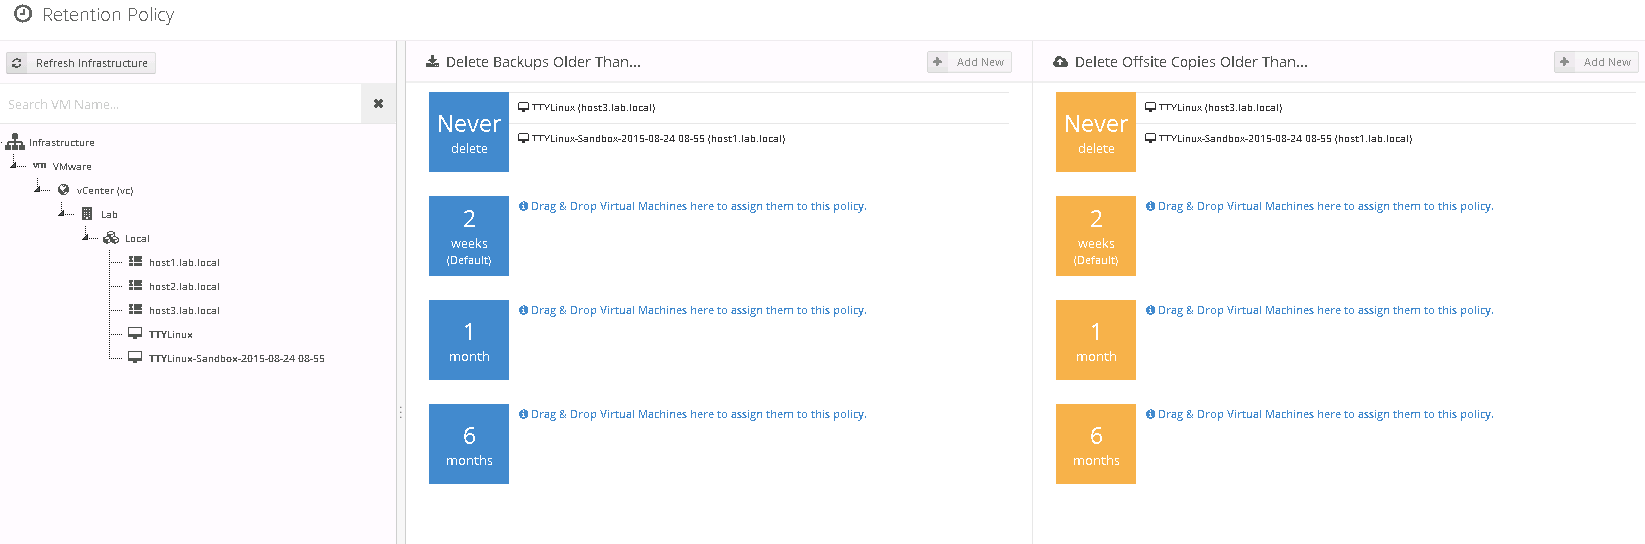
By default you will see the following retention policies: Never delete, 2 weeks, 1 month and 6 months. These are default policies for local and Offsite copies. You can create your own as well. You simply drag and drop the VMs to the proper retention policies that you need and click SAVE CHANGES.
You can take a backup at any time by going to Virtual Machines > Take Backup
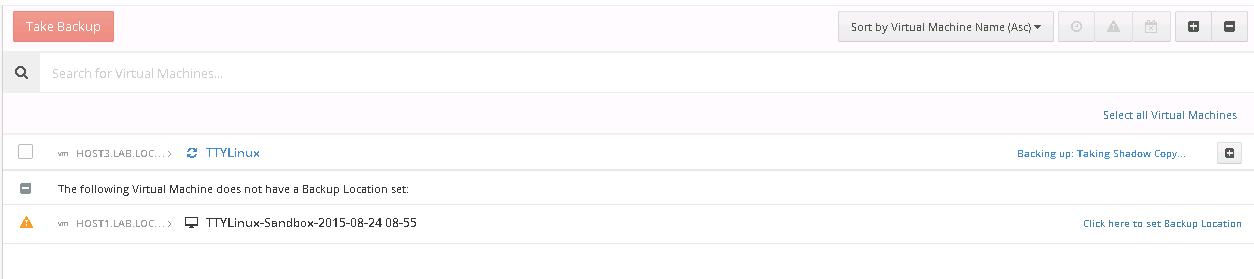
Just click the machine you want to backup and click the red TAKE BACKUP button. I already did that and you can see in the screenshot that a backup is running for TTYLinux.
Restore options are what you would expect from backup software. You can do a full restore or a granular restore, which in Altaro’s case is file level restore or Exchange Item Level Restore.
There is also a Sandbox and Verification option so you can mount backups in a sandbox to test restores. I will show you a full restore in the sandbox so I can power a backup on to verify it was a good backup. To test in sandbox, go to Sandbox & Verification > Test & Verify Backups.

I want to test a full restore so for Step 1 I am selecting that. Click Next to proceed to Step 2.
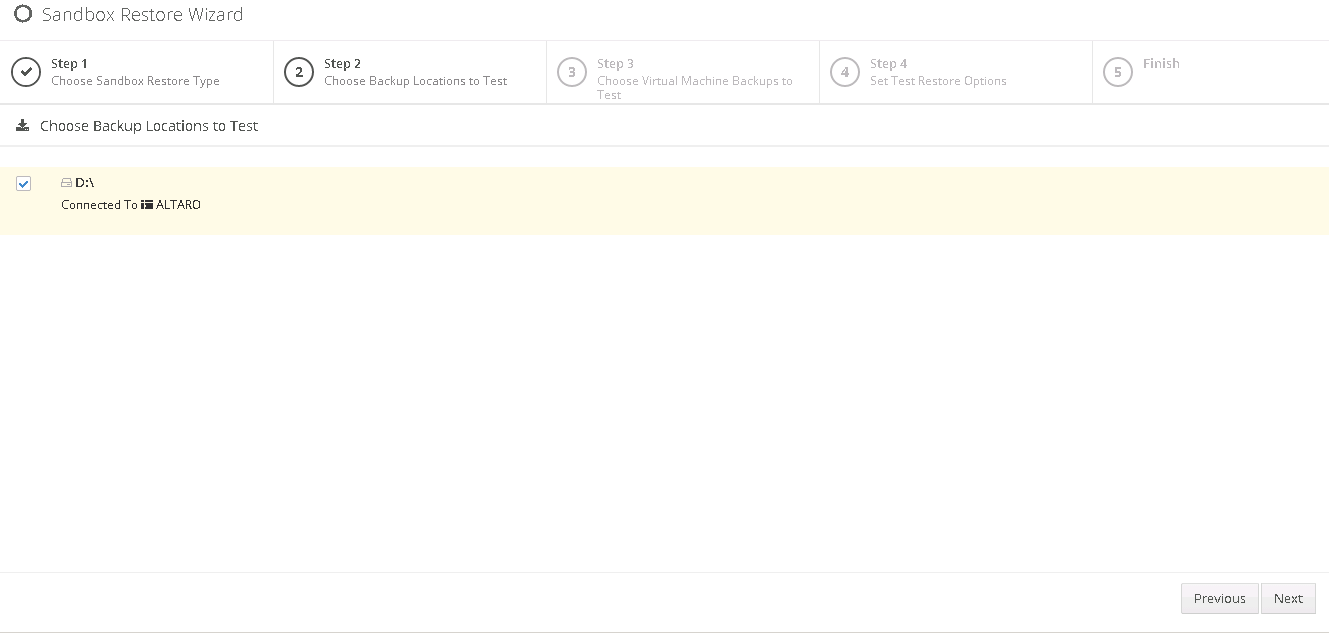
Check the backup locations to test. In my test environment this will be the D drive so I have checked that. Click Next to process to Step 3.

The VMs you can test a full restore of are shown. I only have one VM although for some reason it is showing twice. I will just select the first one and click Next to proceed to Step 4.
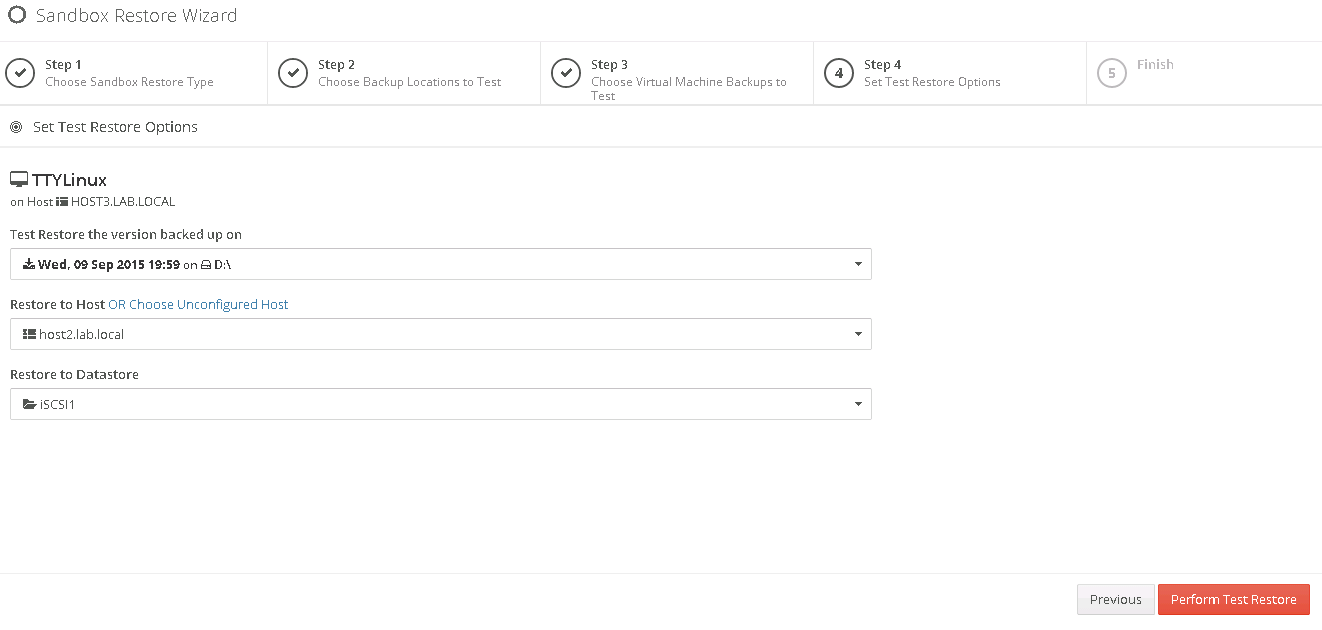
Step 4 are the restore options. You can pick the backup you want to restore. If you have multiple backups of the VMs you can select the instance you want to test. You can also choose the host and datastore to restore to. I chose a different host and datastore to test with. Click Perform Test Restore to start the process.

A green notification will appear that tells you to go to the Dashboard to monitor the progress. Click the green button to head over there.
Once the test restore is complete you will see the VM in your vCenter inventory. The VM name will be similar to TTYLinux-Sandbox-2015-09-09 19-59 but it does not look like it actually puts the VM into a different network group to truly sandbox the VM off from the original. You would need to assign this VM to a different network to not interrupt the production VM. Having to do this manually is not ideal and I would recommend to Altaro that this be added into a future release. Once assigned to a “sandbox” network, power it on to make sure it works. When you are finished testing, power the VM down and delete it.
Overall Altaro is a very nice and easy to use solution for backing up VMware VMs. I like the fact that all the VMs you would assign to storage, backups, retention, etc show on the same screen as what are are trying to configure. That way you can easily select VMs from the left pane to drag and drop to the right pane. I would rate it 4 out of 5 stars as it has all the main features you would want in backup/protection software. The only negative for me is the sandbox feature missing the ability to choose a different network as part of the test restore.
For product information, please visit the Altaro VM Backup site. You can also pull up the latest user guide here.
