
Hello everyone! This is the first post in a series I plan to do around Splunk. One of the things we wanted to do in our Splunk environment was have the Splunk HTTP Event Collector (HEC) setup across multiple Heavy Forwarders (HFs). This way we could have all the same inputs setup once and deployed to all other HEC enabled HFs. There are two ways to do this (NOTE – This document assumes an on-premises Splunk deployment):
- Setup your deployment server so that if you add or edit the HEC settings on that server, it would save these changes into $SPLUNK_HOME/etc/deployment-apps/splunk_httpinput/ instead of in the apps folder. This app can then be deployed to the HEC enabled HFs. See this link for more details: HEC_on_HFs
- Create a custom app to hold all the HEC settings and deploy that to the HEC enabled HFs.
We chose the latter option for a very important reason: Some of our HEC enabled HFs also had Splunk DB Connect installed. DB Connect uses the HEC config that is stored in $SPLUNK_HOME/etc/apps/splunk_httpinput/. If you use option number 1, when the app is deployed, it will delete the splunk_httpinput folder you already have on the DB Connect HF and you will lose connectivity to DB Connect. I learned that lesson the hard way. Luckily we had a git server that recorded the changes that were made so I was able to roll it back. The rest of this post will show you how to create the app on the deployment server, use another instance of Splunk to create your HEC entries to create your tokens, copy those inputs from inputs.conf into the app and then deploy that app to the HEC enabled HFs.
First, lets show you how to create the app. As this is going to hold just an inputs.conf file, here is what I did. Get into the CLI of your Splunk Server and change into the $SPLUNK_HOME/etc/deployment-apps/ folder. Create a new folder using whatever name you want the app to be. In this example, lets use HECinputs. Go into the HECinputs folder and create a local folder. We will come back to the CLI in a bit.
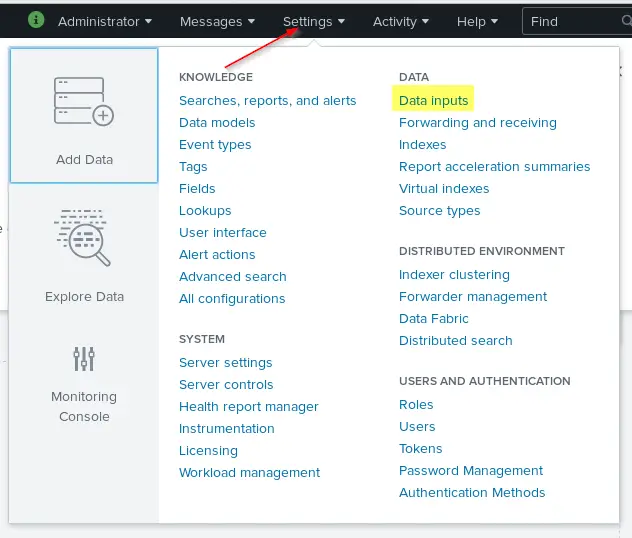
Next, open up the Splunk GUI on one of your other Splunk instances. I have a locally installed copy on my laptop that I use for this. After you login, click settings and Data inputs
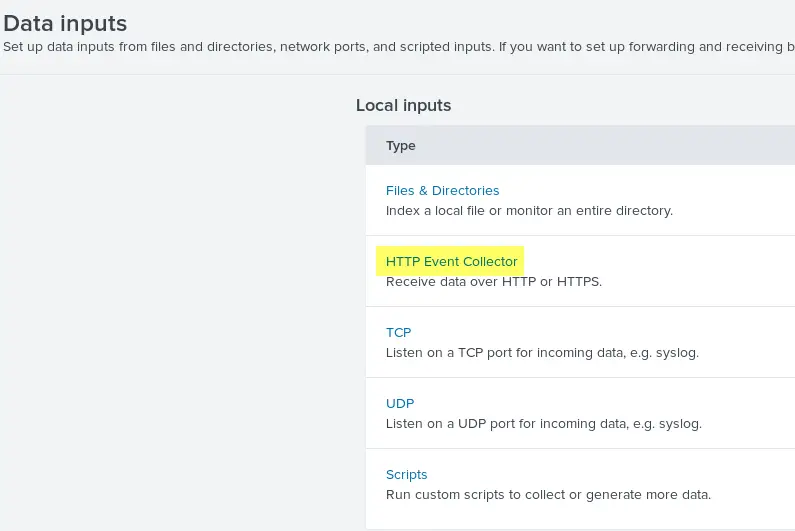
On the data inputs screen, click HTTP Event Collector
On the HEC screen, click New Token at the top right:

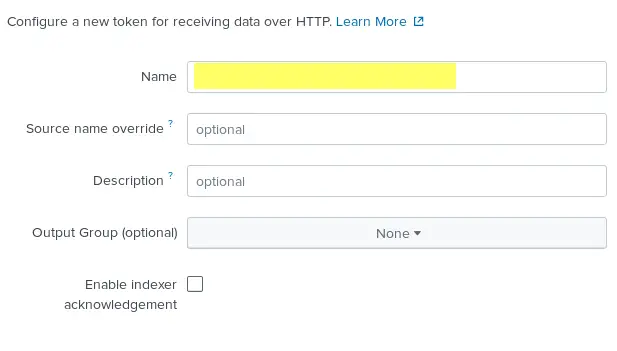
On the Add Data screen, enter the name for this HEC token and click the green Next button at the top of the screen:
On the next page, you need to either pick an existing source type or click New and type in the new sourcetype name. In the app context drop down, pick an app to store this config in. Remember this app as you will need to go there in the CLI to get the inputs.conf file. Choose the allowed indexes for this input and also choose a default index. In most cases, this will be a HEC input for one index so you would choose that index for allowed and default. Click the green Review button at the top.

Review your settings and click the green Submit button at the top.

You have created the HEC input. The token value is auto generated and you can see it in the GUI or in the inputs.conf file. Since we are going to copy the contents of inputs.conf from this server to the app on the deployment server, lets go to the CLI for the server you just created the input on. In my example, this is on a Linux server. Once you are logged into the CLI, go into $SPLUNK_HOME/etc/apps folder. Next, do you remember the App Context setting? That is the folder you want to go into. I put the Test HEC input into the Search App so I need to so into the search folder ($SPLUNK_HOME/etc/apps/search). Go into the local folder under search. In this folder, there will be an inputs.conf file. Show the contents of the file:
[http://Test]
disabled = 0
index = main
indexes = main
sourcetype = _json
token = 3396a456-a09d-484e-bb08-ec82086479b8
As you can see, a HEC input will start with http:// and have the name you specified. See the token? This is what you have to provide to the person who needs to send data to this HEC input. Copy this entire section and paste it into an inputs.conf file in the app you created on the deployment server. Save the file and your app is ready to deploy.
This post will not cover the aspects of the deployment process. Refer to Splunk Docs link below for deploying apps to HFs (Deploy Apps From Deployment Server)
Do you have some Splunk things you would like for me to blog about? Please reach out to me and let me know!
