On June 7th, Commvault held an online event called Accelerating Cyber Defense and Response with Next-Generation Data Protection. During this event, Commvault announced some exciting new products and updates. Here is what was announced.
Commvault ThreatWise (New Updates)
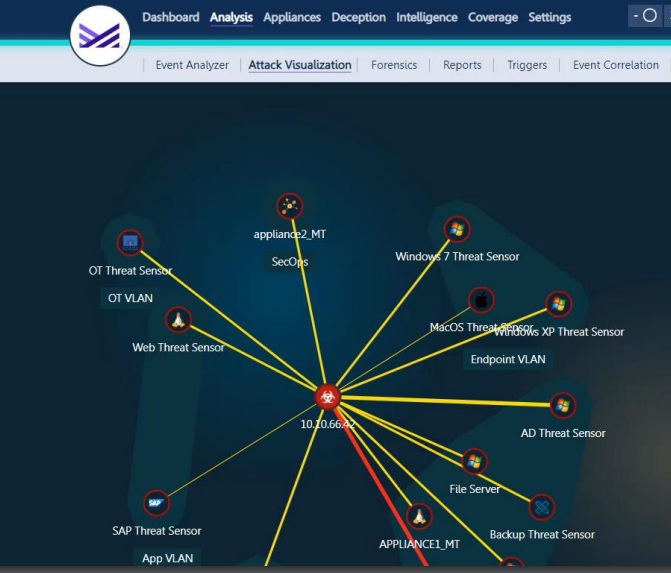
First, what is Commvault ThreatWise? The Commvault ThreatWise solution allows an organization to actively defend their data with fully-integrated cyber deception. This allows them to uncover, contain, and minimize threats the moment a ransomware attack begins.
The new addition is called ThreatWise Advisor. ThreatWise Advisor intelligently recommends sensor placement by continuously assessing workloads protected in backup environments and suggesting what decoys to configure (and where) to further safeguard these workloads.
Commvault Threat Scan (New)
The Commvault Threat Scan solution allows Operations teams can take control and defend their backup data by proactively identifying malware threats to avoid reinfection during recovery. Commvault Threat Scan analyzes backup data to find encrypted or corrupted files, ensuring users recover trusted versions of their data quickly.
This solution addresses the customer challenge of not having insight into malware & ransomware attacks at the early stages, such as when files are being encrypted or corrupted. These attacks can cause greater damage to a company – leading to longer recovery times.

Commvault Risk Analysis (New)
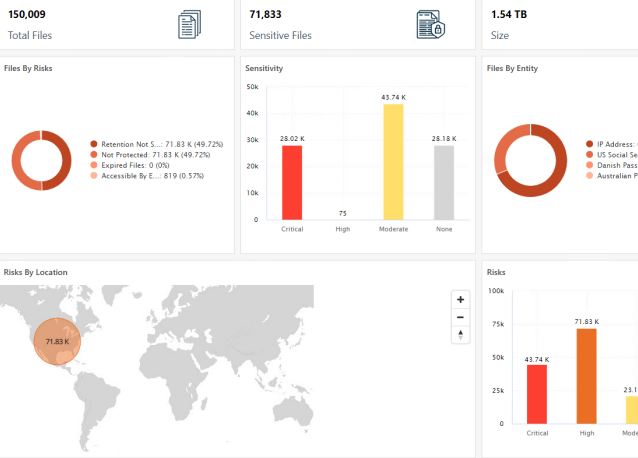
Commvault Risk Analysis helps organizations effortlessly identify and secure sensitive data across their entire infrastructure. They gain visibility into data risks, collaborate, and mitigate potential data breaches, all while saving costs through smart data management strategies.
This solution addresses the customer challenge of ITOps and SecOps teams not having an easy way to identify the classification of data, its age, or usefulness to the organization.
Commvault Auto Recovery (formally known as Disaster Recovery with New Updates)
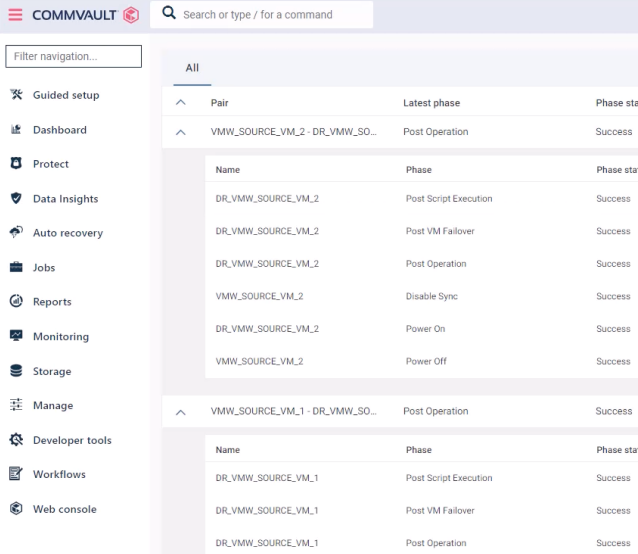
Commvault Auto Recovery provides a single platform that can protect and securely recover applications. Auto Recovery provides customers the ability to protect all applications, not just mission critical apps, with secure verifiable recovery with the lowest TCO.
This solution addresses the customer challenge of needing a way to securely recover their applications when disaster or cyberattacks strike with minimal disruption to the business. Traditionally, this is done with expensive hardware that is cost prohibitive for all but large enterprises. Smaller customers must rely on incomplete offerings from one or multiple vendors and stitch together a complete offering.
Commvault Cloud Command (New)
The Commvault Cloud Command solution allows customers to manage their entire Commvault Data Protection estate for both on-prem and SaaS through a single comprehensive SaaS-based UI, including security and data protection health dashboarding.
This solution addresses the customer challenge of navigating a complex landscape of data protection tools and platforms, ranging from on-premises to SaaS-based solutions. This complexity can be difficult and costly.
Partner Integrations (new)
Commvault announced some new integrations as well, including the SOAR integration with Microsoft Sentinel.
Commvault SOAR integrations provide an enhanced security posture and improved collaboration between Backup and Security Operations teams. Alerts and audit events are sent to the SOAR platform, so SecOp engineers can swiftly respond to anomalies or evidence of compromise while leveraging orchestrated actions to reduce incident response time.
Plugin is available for all Commvault software and Metallic bundles.
Another new integration is with the CyberArk Indentity Security Platform.
Commvault’s integration with the CyberArk Identity Security Platform significantly reduces the risk of credential theft with best-in-class integration that segments the credential storage away from the backup environments. This integration helps organizations follow strong zero trust architecture practices, deploy rigorous lifecycle credential policies, and comply with the most stringent regulations.
Plugin is available for all Commvault software and Metallic bundles.
Final Thoughts
As a consultant that has experience in the cybersecurity field, having a solution to help protect your company data is very important. Commvault has pulled out all the stops by providing a comprehensive platform across their ecosystem. All these new and updated solutions in their platform address the challenges most companies face. I expect Commvault to continue to be the leader in this space and will continue to innovate with their platform.
For more information on all of these product announcements and updates, check out the on-demand version of the event.
https://discover.commvault.com/Event-Security-Launch-Data-Protected-Registration.html
The press release can be read here: https://ir.commvault.com/news-releases/news-release-details/commvault-redefines-data-protection-new-security-capabilities.
View what’s new in the Commvault Platform here: https://www.commvault.com/platform/whats-new